How to Use Paint 3D in Windows 10 (Complete Beginner Guide)
If you are searching for how to use Paint 3D in Windows 10, you are not alone. Millions of Windows users see Paint 3D installed on their computer but don’t fully understand its capabilities. Paint 3D is a free built-in application developed by Microsoft for Windows 10 and Windows 11 users. It is designed to combine traditional 2D image editing with simple 3D modeling tools, making it one of the most beginner-friendly creative apps available on Windows.
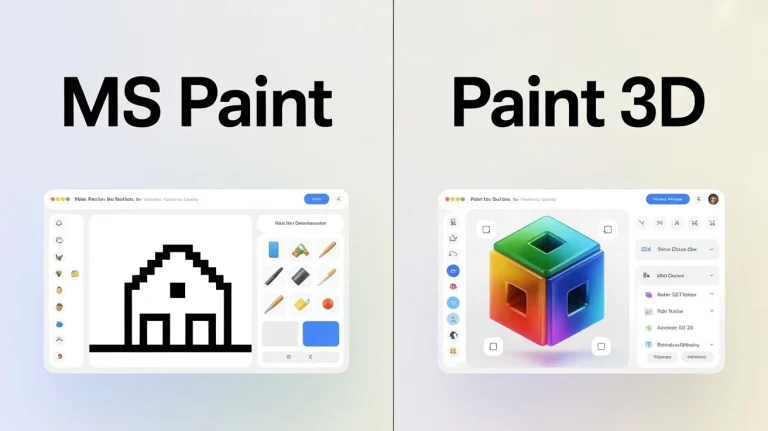
Unlike classic MS Paint, Paint 3D allows you to create 3D objects, remove image backgrounds, add realistic 3D text, apply lighting effects, and export transparent images. In this complete beginner guide, you will learn exactly how to use Paint 3D in Windows 10 step by step.
What Is Paint 3D in Windows 10?
Paint 3D is an upgraded version of the traditional Microsoft Paint application. It was introduced with the Windows 10 Creators Update to provide users with more advanced drawing and editing capabilities. While classic Paint focuses only on 2D drawing, Paint 3D offers the following:
- 2D drawing tools
- 3D object creation
- 3D text
- Background removal (Magic Select)
- Transparent canvas
- Stickers and textures
- Image resizing and cropping
Paint 3D is especially useful for beginners who want simple photo editing without installing heavy software like Photoshop.
How to Open Paint 3D in Windows 10
Opening Paint 3D is very simple.
Click the Start button in Windows 10 and type “Paint 3D” in the search bar. Then click the app icon to open it. If it does not appear, you can download Paint 3D from the Microsoft Store for free.
Since Paint 3D is developed by Microsoft, it integrates smoothly with Windows features and supports common image formats like PNG, JPG, JPEG, and BMP.
Understanding the Paint 3D Interface
When you open Paint 3D, you will see a clean and modern interface. The top menu includes several tools:
Brush Tool
The brush tool allows you to draw freely on the canvas. You can choose from markers, calligraphy pens, oil brushes, crayons, and pixel pens. Each brush supports size and opacity adjustments.
2D Shapes
The 2D shapes section allows you to insert circles, rectangles, arrows, lines, and custom shapes. These are useful for diagrams, presentations, and basic design work.
3D Shapes
This is what makes Paint 3D different. You can add cubes, spheres, cylinders, and custom 3D drawings. These objects can be rotated in three dimensions.
Text Tool
You can insert both 2D text and 3D text. The 3D text option allows you to rotate and position text freely in space.
Effects
Paint 3D includes lighting effects such as studio lighting and soft light. These effects enhance the appearance of 3D objects.
Canvas Settings
Canvas settings allow you to resize the image, turn on transparent background, and adjust dimensions.
How to Use Paint 3D Step by Step
To start using Paint 3D, first click on “New” to create a blank canvas or “Open” to edit an existing image.
If you want to draw, select the brush tool and begin sketching. You can change colors from the right-side color panel.
To add shapes, click on 2D Shapes or 3D Shapes and drag them onto the canvas.
If you want to rotate a 3D object, click on it and use the rotation handles. You can move it forward, backward, and sideways.
For resizing, click Canvas, then adjust width and height.
How to Remove Background in Paint 3D
One of the most popular features is background removal.
To remove background in Paint 3D:
Open your image and click on Magic Select. Adjust the selection box around the subject. Click Next. Refine the selection by adding or removing areas. Then click Done.
After that, enable Transparent Canvas and delete the unwanted background.
Save the image as PNG to keep transparency.
This feature makes Paint 3D useful for logo design, thumbnails, and product images.
How to Use Paint 3D in windows 10 Step by Step
To start using Paint 3D, first click on “New” to create a blank canvas or “Open” to edit an existing image.
If you want to draw, select the brush tool and begin sketching. You can change colors from the right-side color panel.
To add shapes, click on 2D Shapes or 3D Shapes and drag them onto the canvas.
If you want to rotate a 3D object, click on it and use the rotation handles. You can move it forward, backward, and sideways.
For resizing, click Canvas, then adjust width and height.
how to use paint 3d in Windows 10 video tutorial
Here is a Video tutorial of how to use paint 3d in Windows 10:
How to Add 3D Text in Paint 3D?
Click the text tool and select 3D text. Type your desired text. You can change font style, size, and color.
After typing, you can rotate the text in 3D space. This is useful for creative designs and social media graphics.
How to Resize and Crop Images?
To resize an image in Paint 3D:
Click Canvas. Turn off “Lock aspect ratio” if needed. Enter new dimensions.
To crop:
Click Crop from the top menu. Adjust the crop area and apply.
This makes Paint 3D a good lightweight image editing tool.
What Can Paint 3D Be Used For?
Paint 3D can be used for:
- Simple photo editing
- Background removal
- Logo creation
- 3D text design
- School projects
- Social media graphics
- Basic 3D modeling
It is ideal for beginners, students, and casual users.
Is Paint 3D Free?
Yes, Paint 3D is completely free. It comes pre-installed with Windows 10 and Windows 11. You can also download it from the Microsoft Store at no cost.
Paint 3D vs Classic Paint
Classic Paint only supports basic drawing and editing.
Paint 3D supports:
- 3D objects
- Transparent background
- Magic Select
- Effects and lighting
- Modern UI
If you need more creative tools, Paint 3D is better.
Frequently Asked Questions
Final Thoughts
If you are looking for a free, easy-to-use image editing and 3D creation tool, Paint 3D is an excellent choice. It combines simplicity with powerful features such as 3D modeling, background removal, and text design.
For Windows 10 users worldwide, learning how to use Paint 3D in windows 10 can significantly improve your basic design and editing skills without installing complex software.